Mostrando entradas con la etiqueta Mepis11. Mostrar todas las entradas

miércoles, 27 de marzo de 2013

The GRUB Battle Again: Getting Mageia to Coexist with AntiX

Regardless of what people say about netbooks, their portable factor is very convenient for teaching.  However, I wanted to change some of the distros on the HD of my Dell Inspiron Mini 10. It formerly sported
  1. Mandriva 2010.2 (main production distro)
  2. Pardus 2011
  3. Mepis 11
  4. Mageia 2
  5. Mandriva 2011
The problem was that Mandriva 2010 was way too old and Mandriva 2011 way too heavy for the little thing.  Plus, I wanted a distro that could boot the small machine fast in case something popped up and all of the above distros booted in more than 1 minute and 15 seconds (well, except Mandriva 2011, which took a good 2 minutes on the modest specs of the computer).

So, I decided to clean up the partition table, which was a mess because all of  my grub learning has taken place in the netbook, basically.  Thus, I wiped out all the distros and created a new partition table to start afresh.

I decided to start by putting Mageia 2.  The installation was OK as usual.  Then, I installed AntiX because it picked up the Wifi of the machine and it includes LibreOffice (I tested Slitaz, but it would not pick up the wifi and Vector Light took 50 seconds to start).  The installation went perfect and I placed the GRUB on its corresponding root partition.

The problem was that AntiX boots with GRUB2 and Mageia's GRUB, sitting comfortably on the MBR, simply refused to see AntiX.  To make things worse, I have very little experience dealing with GRUB2, so I could not find the way to collect the information that I needed to edit GRUB manually.

Therefore, after trying everything I could think of and failing, I put the issue aside and installed Mepis 11 to see if its GRUB could pick up AntiX.  Although I did not have any installation problems, Mepis installed a GRUB that saw Mageia, but AntiX continued on the hiding.

However, I had an idea: given than AntiX and Mepis share several points, why not trying with the information on Mepis' GRUB using the AntiX kernel?

It was sort of crazy but I gave it a try.  So, once on Mepis, I went to /boot/grub and opened the file menu.lst with Kwrite and copied the entry for Mepis:

title Mepis at sda 8 newest kernel
root (hd0,7)
kernel /boot/vmlinuz root=/dev/sda8 nomce quiet splash
initrd /boot/initrd.img
boot

Then, I booted up Mageia and went to the same location (/boot/grub).  I opened Konsole and entered su, followed by my root password.
After that, I typed :

export $(dbus-launch)
kwrite

and pasted the entry twice (one for Mepis and the other for AntiX).

Then I changed one to read:

title AntiX at sda 7
root (hd0,6)
kernel /boot/vmlinuz-3.6.11-antix.1-486-smp root=/dev/sda7 ro splash
initrd /boot/vmlinuz-3.6.11-antix.1-486-smp
boot

and saved the file.  I rebooted and the new entries where shown by Mageia's GRUB.  I tried the one for Antix and voilà!  AntiX booted the netbook.
Table contrasting the distros on the HD
Yes, Mageia 2 can coexist with AntiX after all and the Dell netbook is now a triple boot.  However, I am saving partitions for Pisi Linux, the new Mandriva release, and Elive.

I guess I need to start learning how to work with GRUB2, by the way...

sábado, 27 de octubre de 2012

From Junk to a Security Station; How Mepis Gave New Life to a Discarded Computer

Last week, a project that had been brewing for quite a while became a reality. 

We wanted to set up a basic security camera for the office where I work but, as the University is short of budget, all we were given was a webcam.   With that contribution, the whole idea was pretty much a long-term goal (or a dream, to be more honest, given the circumstances).

However, I learned that they were discarding some "old equipment", which included computers.  I asked for one of those machines marked as "not-working" and could get a computer in which Windows XP ran so slowly that you could literally age before being able to type a letter with it.

With that poor wreck of a system, the webcam, and Megatotoro's help, we could make the security system dream a reality.

First, Megatotoro wiped out the HD and installed Mepis 11 to it.  Boy, what a difference a good OS makes!  The computer started performing decently.  To use an analogy, it went from snail speed to that of a marathon runner. 

Second, as the webcam was a Logitech model, Mepis recognized it instantly, without the pain of go driver-hunting.  Ah, and since Mepis has VLC, everything was ready for starting the security cam project.

The streaming capabilities of VLC made it easy to capture video from the webcam and store it as a local file.  I learned how to do this by accident a while ago and the process is rather simple:

1.  Under the menu FILE, I clicked on streaming.
2.  In the window that opens, I selected the tab CAPTURE DEVICE
3.  Now, this is the interesting part.  In the line SELECT DEVICE, I typed /dev/video0, and then clicked on STREAM.  A new dialog (Streaming output) opened and I clicked "next".
4.  Then I selected "show locally" and used the drop-down menu to select VIDEO THEORA+VORBIS (OGG)
5.  Finally, I clicked STREAM and voilà, the webcam started showing and recording video!

The humble computer is now there, working non-stop, like a true champion...And the rest of the workers became interested in Linux when they saw what it can do.

After all, who would have said that a discarded computer was going to resurrect as a modest, but effective security station? And for a total cost of $0? All thanks to Linux, free software, and people who know that the Windows paradigm is not the only reality that there is.


domingo, 23 de octubre de 2011

New laptop, new challenge: Which Linux distro is right?

A colleague who is studying abroad came back to the country and visited the University for a while. After giving me a quiz for his research project, he made me an offer I couldn't refuse: he wanted to get rid of one of the laptops he bought for the research-- an HP Pavilion g4-1135dx, AMD dual core, 3GB RAM, and more than 300GB HD, Windows 7 Home premium and MS Office 2010. The price he gave me was half of what I have to pay for it here and the laptop is practically new. It's not that I need a new mobile computer right now (my penta-boot netbook meets my needs for work perfectly), but I must confess that I have been considering to buy myself a laptop, one that I can use as a test ground. I knew there was no way I could get a better price for that machine here in my country, so I bought it and the questions began.

Windows 7... what to do with you?

I was not sure if I wanted to keep this OS and the MS Office suite. While I do not particularly hold a negative opinion about the former, I hate the latter passionately. In addition, it's not like I need to use Windows for something anyway. In the computers where I do have Windows, this OS works more like a storeroom than anything else.

After considering the options, I decided that I would settle for a dual boot. That was my decision, but Windows, as usual, had other plans: my headaches began when I tried to resize the partitions. Someone had made an extra partition and the table was full thanks to HP and its policy of slicing the hard drive. I selected the partition that I thought was harmless and resized it. Windows refused to boot and asked me for the rescue DVD which, of course, I did not have. It was almost midnight and I had little patience for babysitting a spoiled OS, so I changed my mind and simply wiped out all partitions and reformatted them, exorcising all traces of MS software from the machine in the process. I wanted the laptop to test Linux distros, not Windows, so I will not miss Vista/7 at all.

Let the Linux parade begin!

With a blank HD and no further concern, I aligned my Linux Live CDs and DVDs for a test drive of the hardware. I chose Mandriva 2010.2, Linux Mint 11 (Katya), Mepis 11, Chakra (the latest) and PCLinuxOS 2011.6. I deliberately left Ubuntu, Pardus 11 and Mageia 1 out because I didn't have live media of Pardus and Mageia and I personally don't like Ubuntu.

The test was simple: the distributions that managed to activate the sound system and the wi-fi of the laptop and could deliver an acceptable multimedia experience would go to the next stage (installation). These are the results:

1. Mandriva 2010.2 failed (no sound, no wi-fi)
2. Mepis 11 failed (sound, but no wi-fi)
3. Chakra failed (sound & wi-fi, but video wouldn't play)
4. Linux Mint 11 (passed with honors)
5. PCLinuxOS 2011.6 (passed with honors)

Second stage: installation and effects

1. PCLinuxOS
As I'm rather familiar with its installation process, I installed PCLinuxOS first. I was not very sure because I have some problems with effects on my desktop (nothing that prevents me from sleeping, actually), but PCLinuxOS went out like an energetic Texas longhorn and installed everything without a flinch. I tried the Kwin effects and everything was perfect! Of course, I was lacking the Office suite but the process to get it is simple enough for a Linux non-technical user like me: you fire up Synaptic, search "lomanager", select it for upgrade, close Synaptic and click on the Libre Office installer icon on the desktop. The only drawback, if any at all, is that this is a 32 bit OS... Again, nothing that matters much to me.

2. Linux Mint 11 "Katya"
I installed the 64 bit version of Linux Mint. I have always liked the elegance of this OS and the way it handles the installation process. I noticed something new: Mint said that it had detected PCLinuxOS and prompted me for an action. I selected "install next to it" for a dual boot. However, after the process was complete, PCLinuxOS was unbootable... In Linux-Linux dual boots that happens quite often, but my real problem was that I do not know how to repair it from the grub mechanism in Mint (Megatotoro taught me the ropes for GRUB legacy, but I simply do not know how to repair this thing). The only option was to start over...

Installation again and a surprise contestant

I put PCLinuxOS back, but not Mint. I will eventually, once that I know how to handle the dual boot without messing with the other OS.

When everything was back in place, I considered if I wanted to give Mandriva Desktop 2011 a chance. I mean, I am not crazy about the ROSA rocket bar and SimpleWelcome, but reports are that it is buggy and Mandriva 2010.2 couldn't activate the Wi-fi, so why would this Mandriva version be any different?

What the heck! I inserted the Mandriva Desktop 2011 DVD and....Surprise, I had sound! I checked the Wi-fi and...Surprise again, it picked up my network signal! It had some issues with the effects and I knew it had problems with Flash, but I installed next to PCLinuxOS just for the sake of testing.

Mandriva 2011 had some problems with the graphic card (no log out, some freezes), but the OS detected that it was due to the lack of a proprietary driver and, after installing it, all those problems disappeared. I installed the flash plug-in from the repositories and the distro is working flawlessly... Who would have thought? :-)

Another distro, another surprise

After downloading the Mageia 1 Live CD, I did not expect anything different from Mandriva 2010.2. However, Mageia Live booted without a glitch and sound was also enabled. I checked the Wi-fi and, yes, it was also picking up my signal.

Moral: Never take a Linux distro for granted. As it turns out, I have enough distros where to choose from to power up this new laptop :-)

I think that I'll keep PCLinuxOS as my main OS. I might also put Mageia in there as a production distro. I'll keep Mandriva 2011 to have a triple boot. Then I'll save a partition for testing.


domingo, 26 de junio de 2011

KDE configuration for Linux newbies

One of the many good points about Linux is that the user can configure virtually anything to adjust the system to his or her liking. Many users are aware that it is possible to install color schemes, desktop themes, wallpaper images, sounds, and many more resources from the system (hitting the "Get new (theme, color, sound, etc).

However, some newbies might want to pick one sound from this set and another from a different one. Maybe they would like the oxygen theme but would like to keep the la-ora pager to switch workspaces. Perhaps they would like to skin poor Kopete with something to make it more appealing. Or they are simply dying to keep an aquarium in the lower panel to entertain themselves with the fish... who knows?

These are some ideas of where to go to customize KDE. And, by the way, you can do all this without resorting to the terminal (yes, I know it's not as fun as doing it with the charming black screen, but still...)

First, are you acquainted with Kde-look.org? You can download many goodies from there.

A. Kopete skins

This one is easy. I'll use it to illustrate how to work with the "Get new___" button that you get in many of the KDE resources. All you must do is start Kopete, go to settings in the menu, and then select the icon "Chat Window" from the left. Under the "style" tab, you can see the available skins. You can download new ones using the "Get new" button at the bottom. You can browse and select the one you like and, to the right, you will see an "install" button. Click on it and then you can select the downloaded skin from the options in the previous window. I am using the "perfect_pushpin" style as an illustration.

Kopete, regular appearance (in Mepis 11)

Kopete with a new style in Mandriva 2010.2
B. Menu translucency

This one is very simple, too. Just click the tools icon in the lower panel (or Menu->tools->system tools-> configure desktop) and click on "appearance"->desktop effects. Open the tab "all effects" and look for "translucency". Assuming that it is active, click on the little tool icon next to it. A window with several control opens. Find "Menu" and drag the indicator to the left to make the menu more transparent. This works particularly well with dark color schemes, such as "Obsidian coast", "Friendly Dark", or "Night and Blood". As the icons in the menu become clearer, it is not a good idea to set the transparency level too high or use it in combination with a light color scheme.

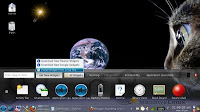
Menu translucency in Pardus 2011
(This last color scheme is Obsidian Coast)
C. Plasmoids

As you know, you get them from the cashew once you have unlocked all graphic elements. Well, you need to work with the cashew in the lower panel. You get many plasmoids form there. However, what if you want a plasmoid that is not included in your distribution? Well, if you do not want to browse the pool using "get new graphic elements", then you download the plasmoid from
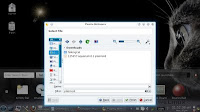
here and, once that you have the file in your HDD, you select "install local file"-> plasmoid, and browse to find the file in the appropriate folder. This works if the file is a plasmoid. If it is a .tar file, the installation is more complicated.

Here is the process in Mandriva 2010.2


D. System sounds

First, you need to have a collection of sounds and must make sure that you remember the location of the folder where they are. Again, you can download and uncompress some from Kde-look.org.
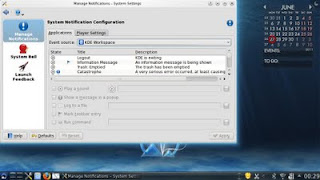
In KDE 4.4.3 and (Mandriva 2010.2), you have to go to "System settings" ->notifications. Once there, in the tab "applications", look for "KDE system notifications".
In KDE 4.5.3 (Mepis 11),and 4.6.4 (Mageia 1, Pardus 2011...), you can achieve the change from "System settings" ->application and system notifications.

Changing sounds in Mepis 11


E. Panel and pager
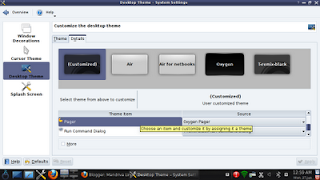
Let's suppose that you installed the T-Remix theme but you don't like its pager, so you want to use the one in the Oxygen theme. Again, in KDE 4.4.3 (Mandriva 2010.2 ), you go to the tools icon in the lower panel (or Menu->tools->system tools-> configure desktop) and select the tab "advanced". Once there, click "Desktop theme details"" and under "theme item" go down to find "pager". Next to it, you can select the theme you want independently of the one you have installed on your system.

In KDE 4.5.3 (Mepis 11) and in 4.6.4 (Mageia 1, Pardus 2011), you find the details as a tab in "Workspace appearance"->Desktop theme. The rest of the process is the same.

Changing the pager in Mageia 1

I hope that you can use this information to make your Linux desktop more to your personal taste. After all, if one has to spend a lot of time on the computer, it's a good idea to keep it as eye-pleasing as one can :)

Happy Belated 15th Anniversary!

Wow!  Another year flew by!  Yes, I have not been very active posting on this blog for some time now. In fact, the last post was precisely o...